AT89S52 programmer
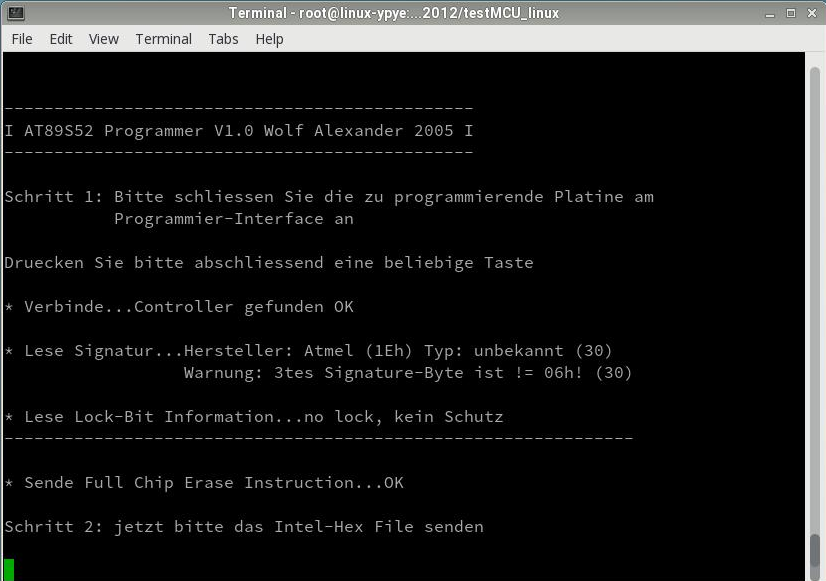
Because I needed a programmer for the AT89S52 microcontroller I decided to build a very basic one myself. This page should give a quick summary about the outcome of this project. I built this programmer a long time ago in the year 2005, and since then I have used it a lot for firmware development for the AT89S52, and for programming of all my boards using this microcontroller. My goal was never to build a fancy programmer with all the possible functions: all the programmer should be able to do and all it can do is to take a Intel hex file via RS232 interface, and then to program and verify the code byte-by-byte.First I was afraid about the complexity of decoding the Intel-Hex Format, but as it turned out later there was very good documentation about this topic, and I was also able to get it working very quickly. The Intel-Hex Code I used with the programmer until now was only compiled by Keil uVision2 for the AT89S52. That means I can not guarantee right now that this programmer will also work for Hex-Code generated by a different compiler.
Hardware
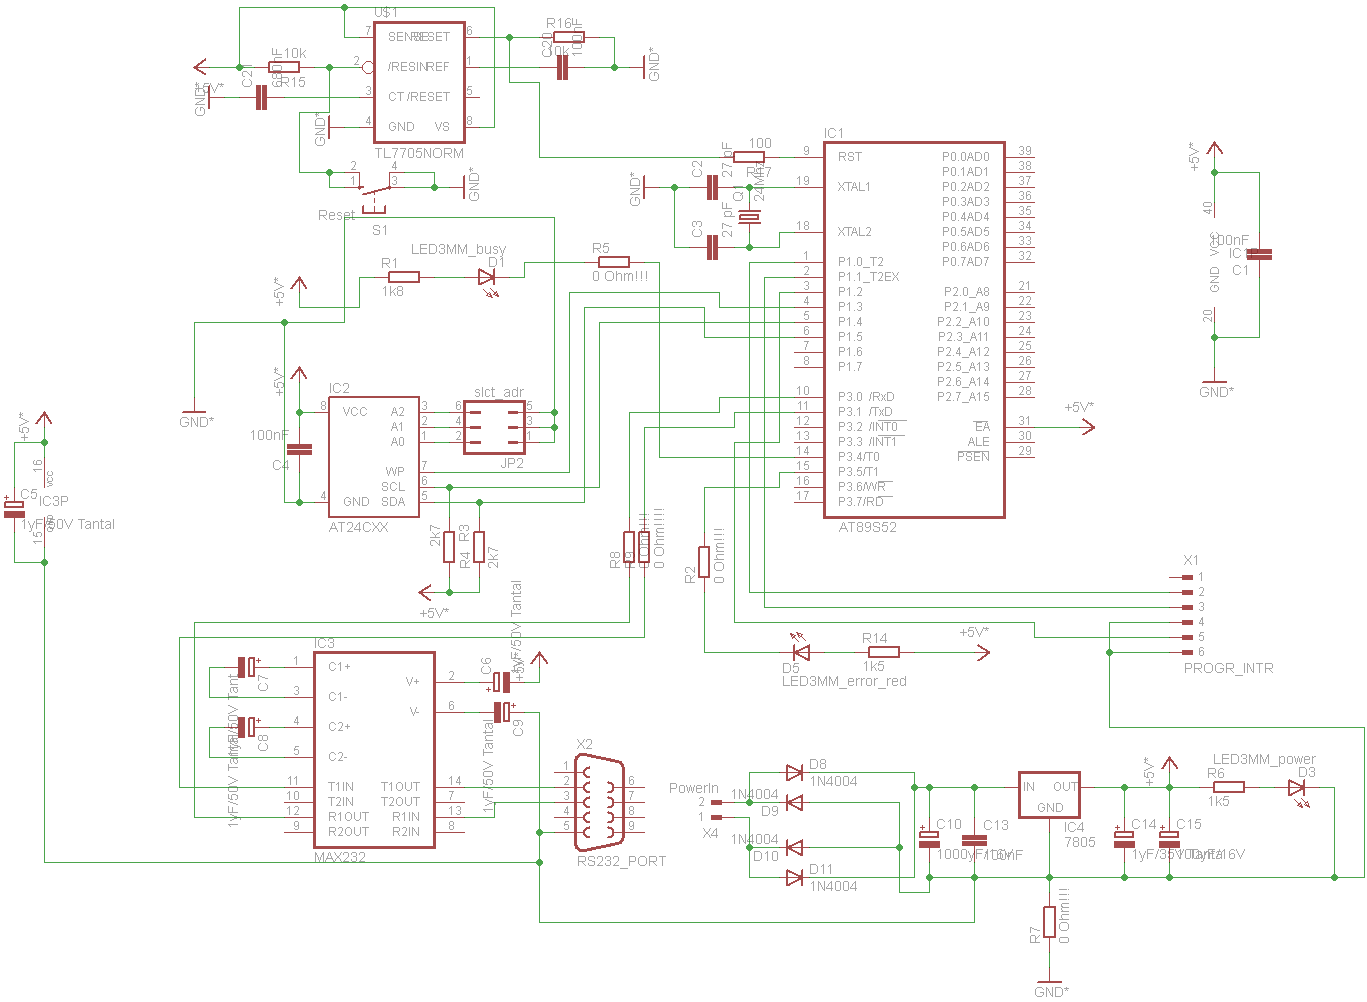
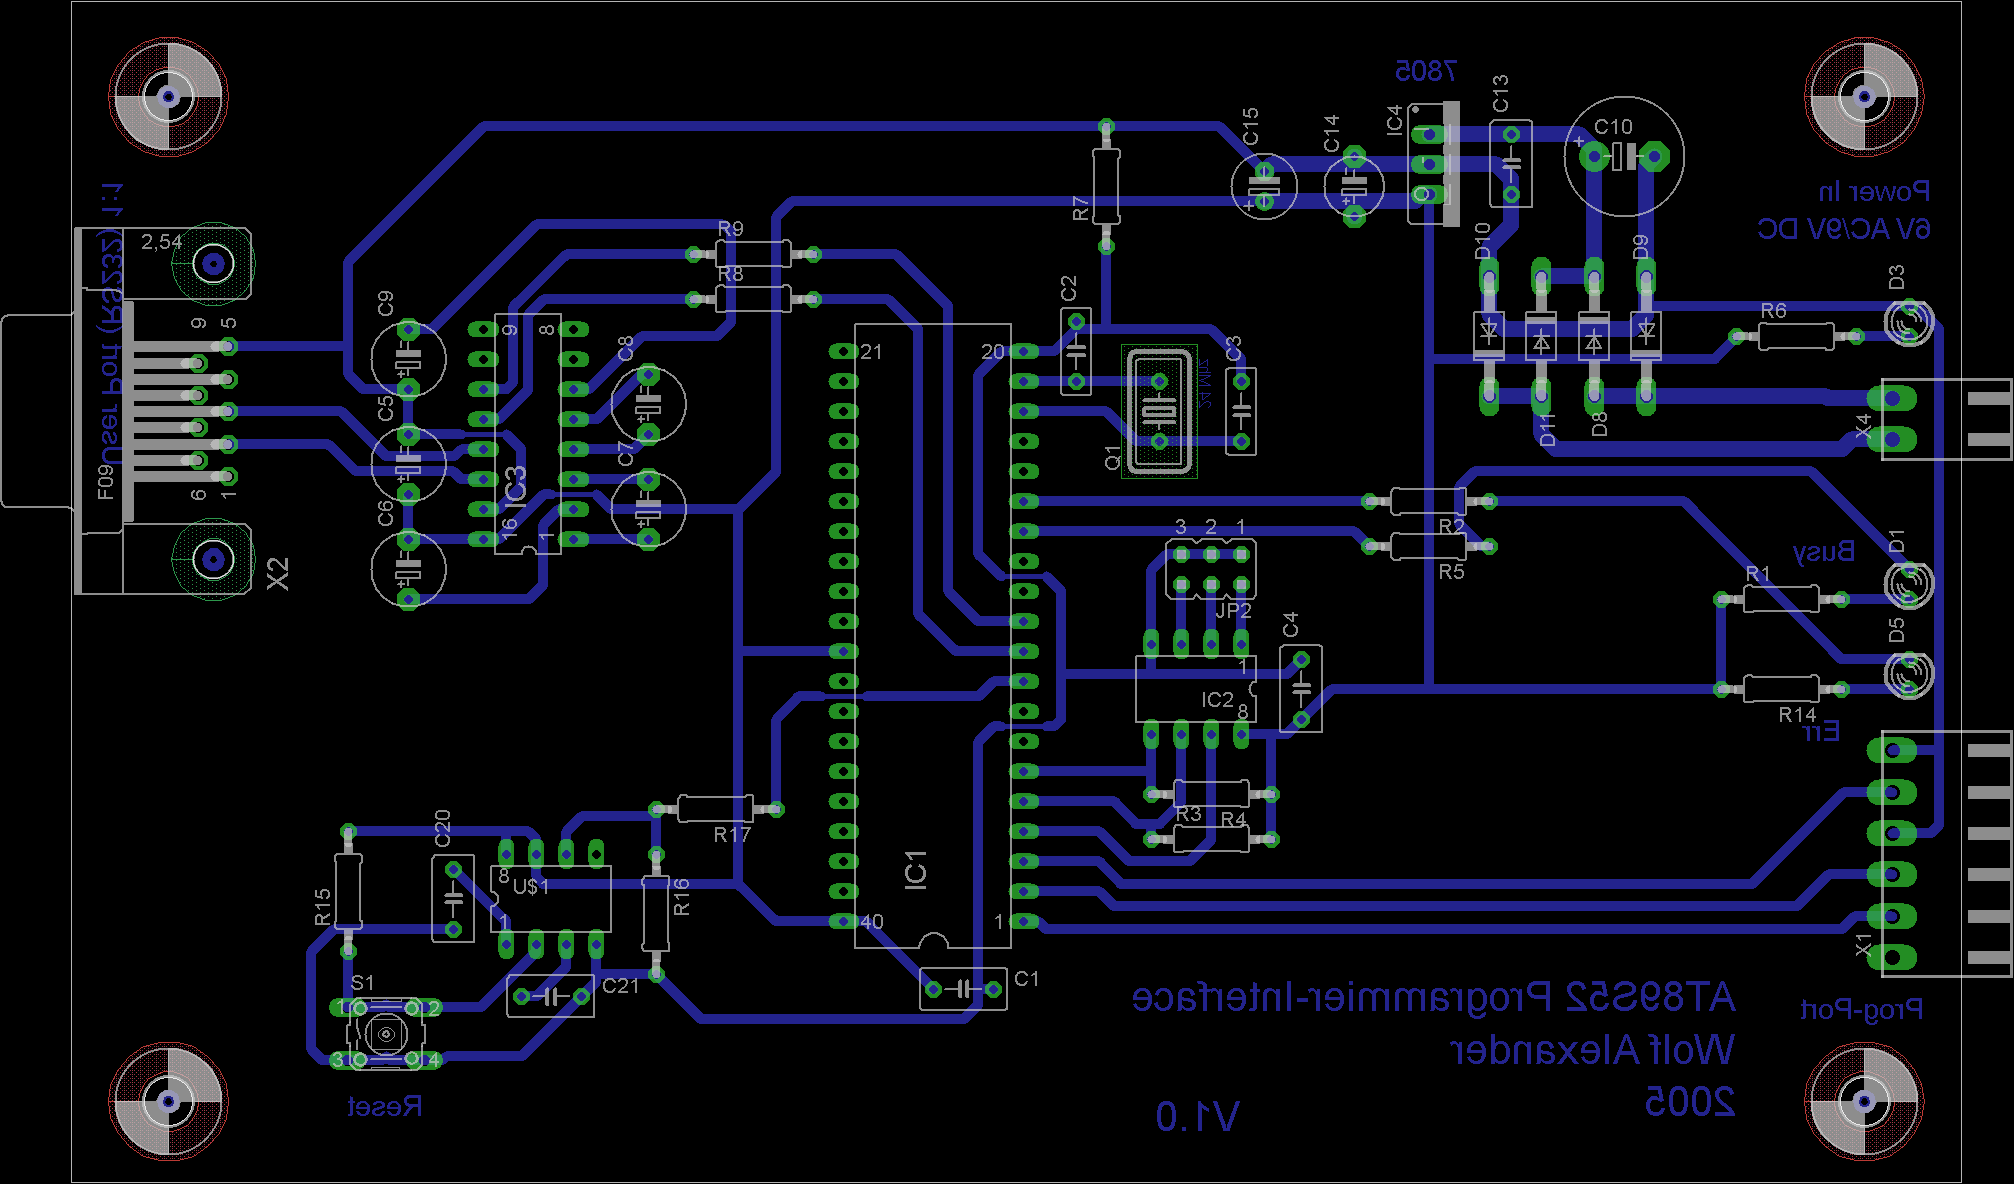
Power supply of the programmer: not much to say about the simple linear power supply concept. Power is delivered by a small wall power supply, a bridge rectifier and a 7805 regulator make sure that we get the needed +5V supply voltage. The RS232 interface voltage levels are generated by a MAX232 device. The programmer is controlled by the firmware which runs in a AT89S52 microcontroller. The microcontroller is supported by a TL7705 reset controller/brownout detector. A socket for an additional AT24CXX serial I2C eeprom was placed on the PCB, but is not used right now. This eeprom could have been used to remember some settings like baudrate and so on. At the end I have never used this functionality and I set the baudrate for the programming interface to a constant 9600 baud.The diagram below shows the complete schematic of my AT89S52 programmer. By clicking on the schematic it can be seen in full size. After I have tested this configuration I decided to make a PCB design in Eagle. This design was then etched and the circuit was built using through-hole components.
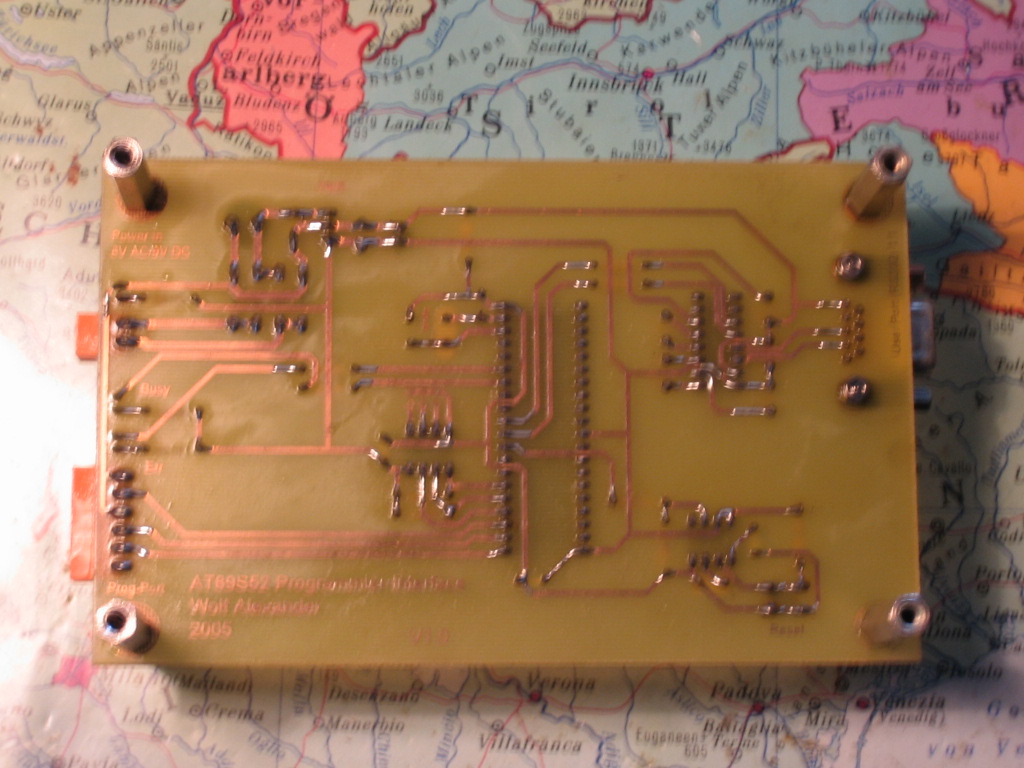
The fully functional PCB and all the needed cables are shown below.

Firmware
The firmware was written using some assembler and mainly C. I used Keil uVision2 as the IDE and 8052 compiler. Development and testing of the firmware was a special and interesting situation: Because the programmer uses the same microcontroller I want to programm at the end with the final circuit I had a chicken or the egg problem. I solved the problem in the following way: I used a 8052 development board (clocked with a 12 MHz crystal) we built in school to generate and test a first firmware for programming. I connected this development board temporarily to my first AT89S52 device, and I made sure that I am able to program it. After the first success I had to modify this firmware for the AT89S52 on the final programmer PCB, because it uses a 24MHz clock frequency, and so the firmware timing had to be adjusted again. After doing several iterations and loops I was finally able to program another AT89S52 device with the programmer PCB and the chicken or egg situation was solved. At the end I programmed a spare AT89S52 for storage in case my microcontroller on the programmer PCB would be damaged one day.Usage
Because the programmer is terminal based it is very flexible. A long time ago I used it with Hyperterminal, but nowadays I'm using minicom.